The Little Red Dress You NEED For The Holiday’s

This little red dress is SO PERFECT for the holidays!!! I literally can’t get over how perfect it is LOL. It’s from my new favorite brand at Target called Wild Fable. I seriously want just about everything they’ve been putting on the shelves, and I can’t pass on the super low prices for the high quality. This dress was only $18 and I love that you can style it so many different ways. I feel like it would look really cute with a white long sleeve turtle neck underneath and some white booties! You could also pair it with over the knee boots, a leather jacket, and a slick high pony. I could seriously go on for ever y’all! I guess one could say I love fashion haha. 

It is a must to get pictures at a Christmas tree farm during this time of year. So I picked Jackson up a red sweater from Target of course, and headed to Johnson Brother’s farm with some of the SoCal Blogger Babes! Those pictures will be up next with a Babe Gift Guide! Jack’s sweater is seriously SO cute and really thick. He looked like such a little man in it…totally melted my heart.

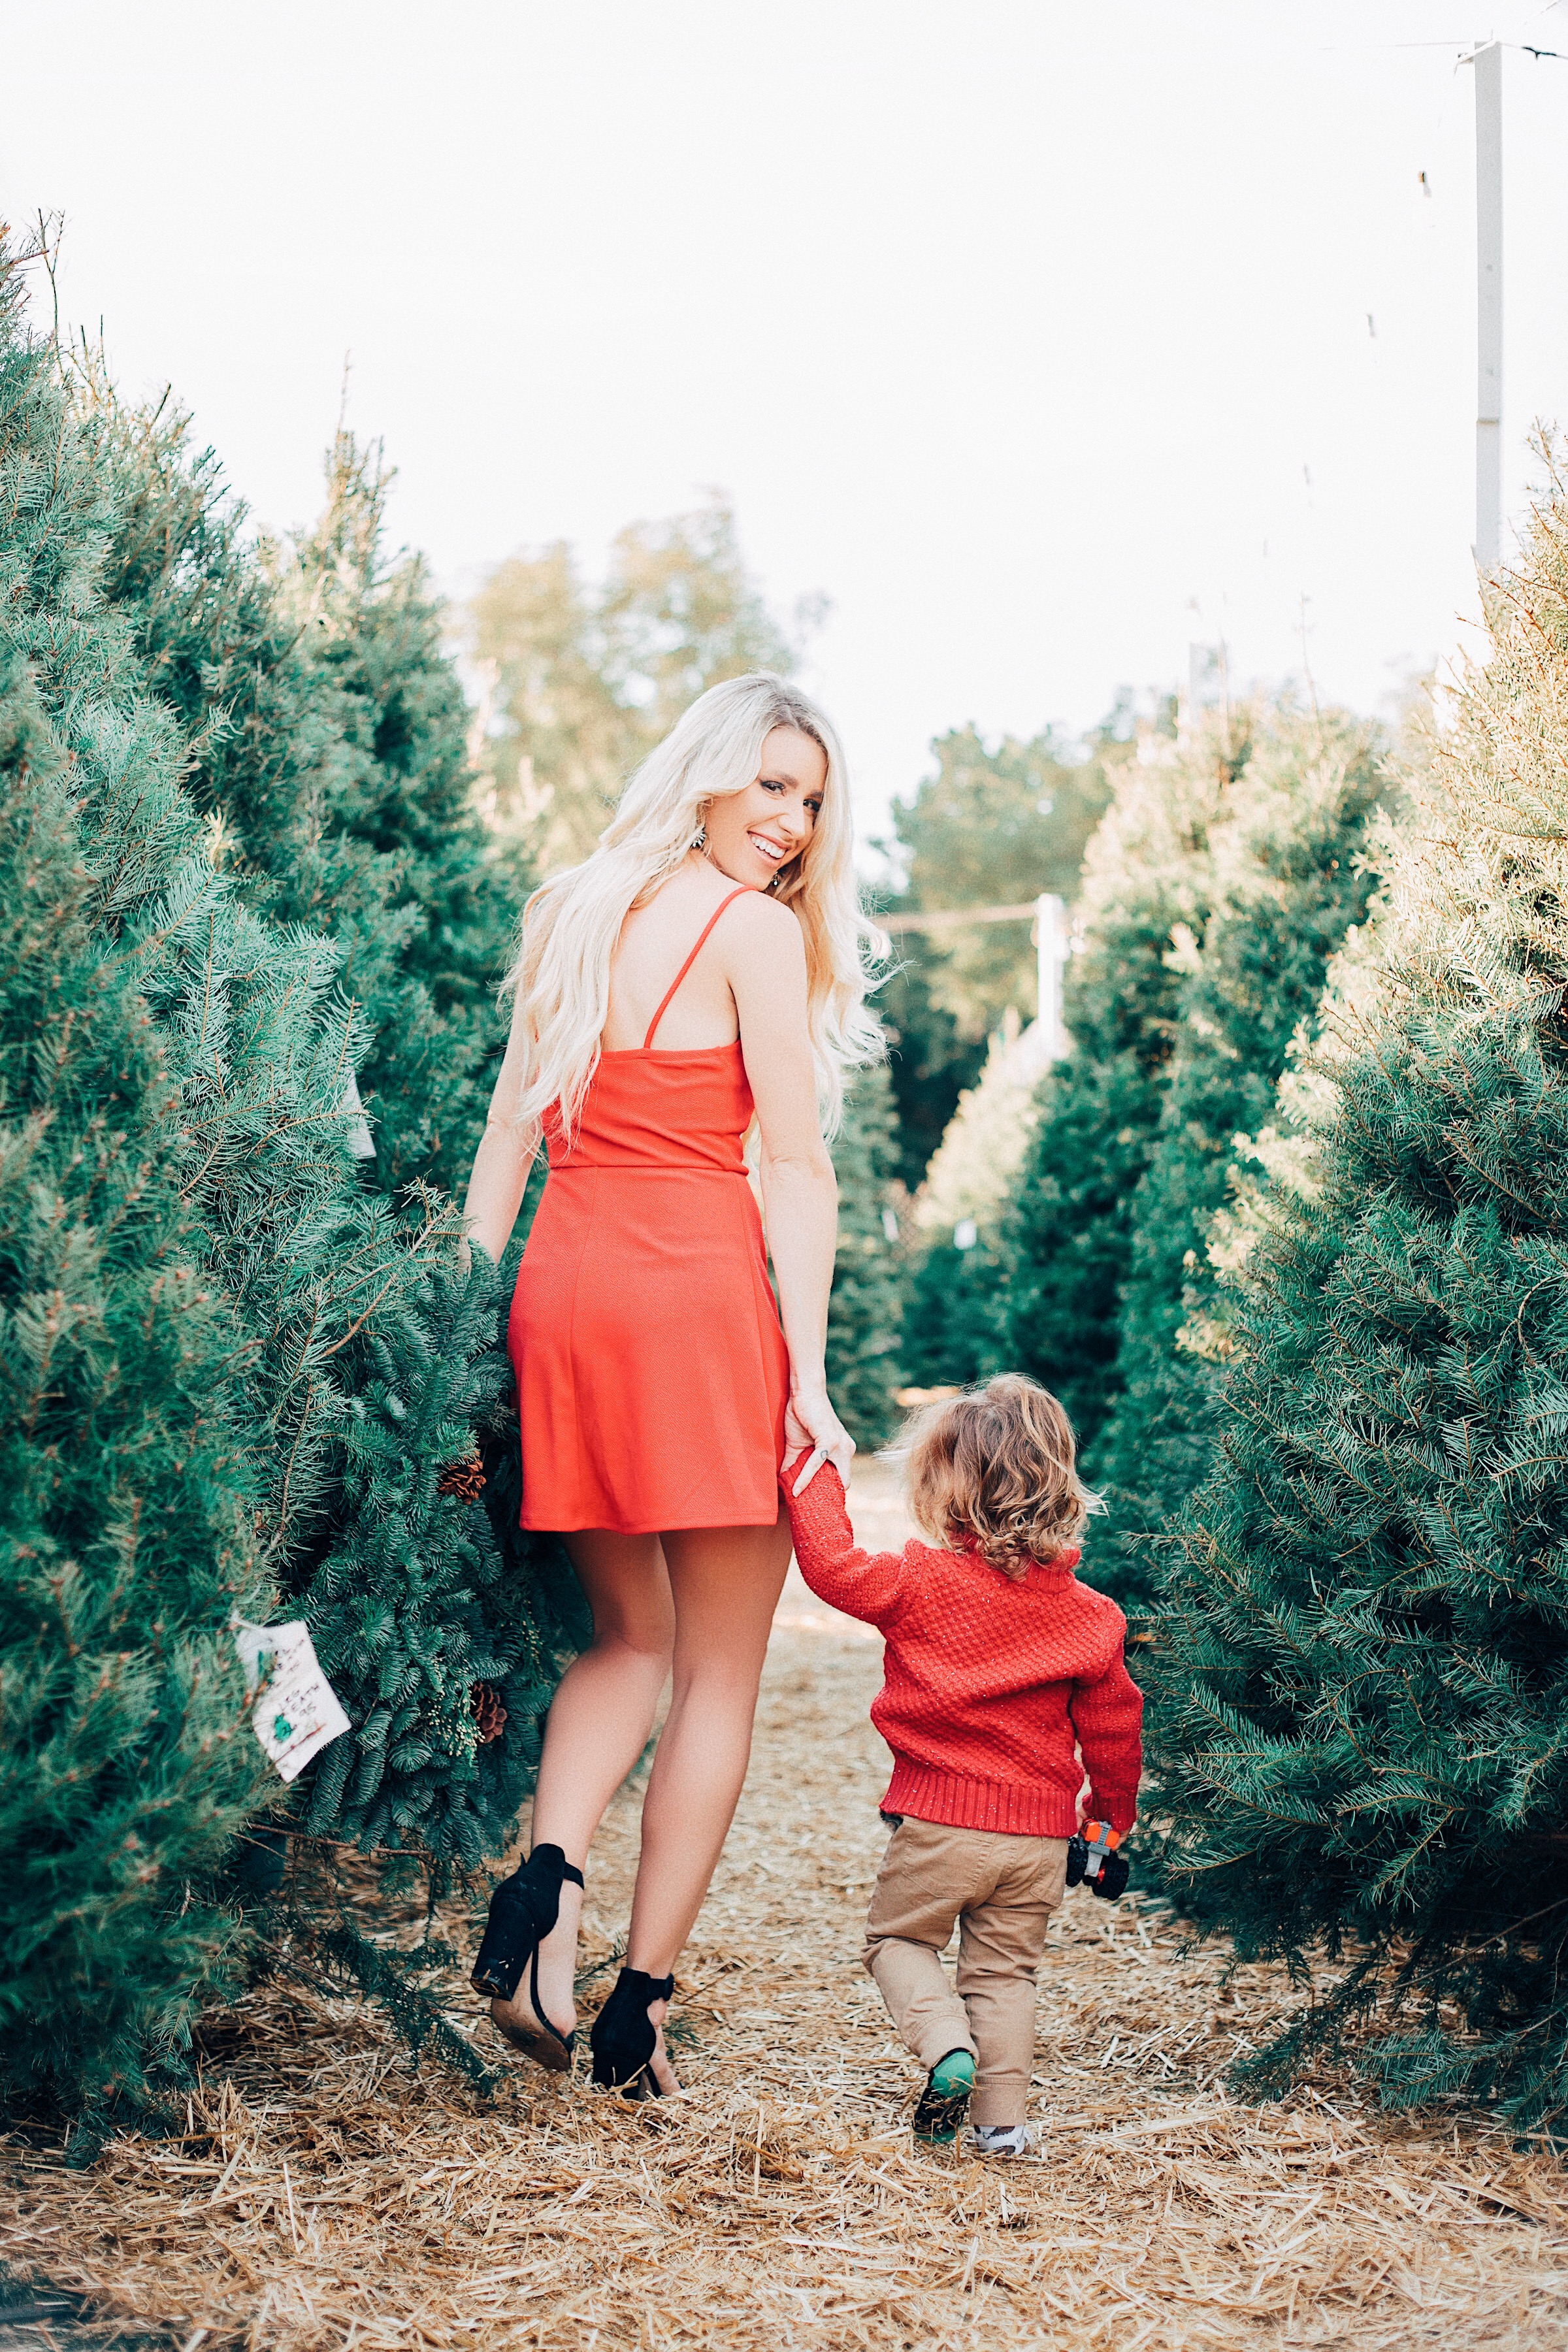
One of my all time favorite earrings brands is Sugarfix by Baublebar. They seriously have the CUTEST earrings, and again at affordable prices. I picked up this classic pair from my local Target recently, and they also have them online! My shoes are old but I found a similar pair that I honestly think are cuter than the pair I own. I love the fringe detail, SO CUTE.

If you get this dress, make sure you tag me on IG so I can see how you styled it! Thanks for stopping by! ❤

My Favorite Target Finds: Holiday Edition 2018

One of my ALL TIME FAVORITE places ever….TARGET!!!! I literally go there for just about everything and then some. I like to blame my mother for introducing me to Target runs at a young age…I stood no chance haha. It’s the first of December and Target has some of the cutest holiday decor this year, so I rounded up some of my favorites and styled a little shoot with @emilyybaranski! We seriously had a blast putting this setup together / shooting it. Stay tuned for more pictures….and trust me we took a lot LOL. 

A few extra because I literally can not go to Target or Target.com without seeing stuff I had no idea I NEDED haha. Seriously though, Target still has a ton of amazing sales going on, and if you have a red card that’s another 5% (just get it already!!!) I literally said no for so many years and for this girl that’s prob like thousands of savings I missed out on!!

If you see something in my picture that is not linked above it’s most likely from the 99cent store haha! Feel free to email me if you need a link or have any questions! shelby@stylingsunshine.com

Christmas is Best with a Drink & Dessert

∇ Healthy Cinnamon Eggnog ∇

drink4

drink

drink2

drink3

The holidays are the perfect time to break out the eggnog. But if you’re like me, and have never been a huge fan, you might be a little on the hesitant side. This slimmed-down/cinnamon version turned me into an eggnog fan. Skipping the heavy creme, using fewer yolks, and low fat milk makes this recipe somewhat more on the healthy side! 🙂

WHAT YOU NEED:

3 Large eggs

3 Large egg whites

51/2 Cups low-fat milk

1/2 Cup organic sugar

2 Tbsp cornstarch

2 Tbsp. vanilla

1/4 tsp salt

1/2 tsp cinnamon

1/2 Cup pure cane sugar

Red color dye

1/3 Cup dark Jamaican rum (optional)

↓↓↓

STEP 1: Mix in a bowl with a whisk eggs and egg whites; set aside. In a large saucepan, with heat-safe spatula, mix 4 cups milk with sugar, cornstarch, and salt. Cook on medium-high until mixture boils and thickens a little bit, stirring constantly. Boil 1 minute and then remove saucepan from heat.

STEP 2: Gradually mix 1/2 cup simmering milk mixture into eggs; pour egg mixture back into milk in saucepan, mixing constantly, to make custard.

STEP 3: Pour custard into large bowl; stir in vanilla, nutmeg, rum, if using, and remaining 1 1/2 cups milk. Cover and refrigerate until well chilled, at least 6 hours or up to 2 days. Mix sugar and a few drops of color dye in a bowl, then transfer to plate. Get the rim of your glass wet and dip class into sugar. Sprinkle finished product with cinnamon. Makes about 7 cups.

*I got the glass I used at the dollar store and they had tons of other cute holiday glasses*


∇ Strawberry Christmas Trees ∇ 

tree

tree2tree5

tree6

This dessert is so so yummy and super easy to make. There are so many versions you can make by using the many options Oreo sells. We used the ‘mint’ flavored ones (warning: highly addictive) but you can pick which ever flavor you like. I wish I would have used a little darker icing but they still turned out pretty cute. This is a fun dessert to make with children as well!

WHAT YOU NEED:

Strawberries (tops cut off)

Oreo’s

White icing

Green icing

Sprinkles

↓↓↓

STEP 1: Place Oreo’s on serving plate and add a layer of white icing on top (snow). Cut off tops of strawberries.

STEP 2: Ice each strawberry with green icing and then add the sprinkles. After each strawberry is iced, place it on top of the Oreo.

STEP 3: Put serving plate in fridge for at least 30 minutes, serve and enjoy! 🙂


Give Thanks DIY Project

givethanks2

give4

give3

give2

give5

give6

give8

give7

give11

give9

give10

GIVETHANKS

givethanks3


WHAT YOU NEED:

1 long wooden plank

white paint

orange paint

brown paint

large sentinel letters

medium sentinel letters

sand paper

round paint brushes

medium paint brush- I used this one

thin paint brush


This project is really easy and turns out super cute! I got this piece of wood in the ‘sale’ section next to the wood cutter at Lowe’s. At the time I had no idea what I was going to use it for, but it was so cheap that I couldn’t pass it up. Thanksgiving has always been on of my favorite holidays, so when I realized I didn’t have a decoration for the front porch, I decided to make something. For me personally, I love arts and crafts and making things on my own versus buying something at the store. For this project, I got to spend some time with my pups on the porch on a perfect fall day; for me the definition of perfection! Thanks for stopping by 🙂


STEP 1: Sand down wooden plank

STEP 2: Paint board white with medium brush – 2 light layers to get the distressed look

STEP 3: Use medium stencils to spell out the word “GIVE” and paint with round brush (dabbing gets the job done the cleanest when using stencils)

STEP 4: Use large stencils to spell out word “THANKS” again using round brush

STEP 5: Once completely dry, use small brush to touch up any areas

STEP 6: Sand edges of the board to complete the distressed look